Why Viking Drawings?
Kept seeing cool Viking art online but thought nah that’s too hard for me. Then found this 5-step method promising “easy for beginners.” Grabbed my kid’s sketchbook and a chewed-up pencil thinking let’s try this before dinner.
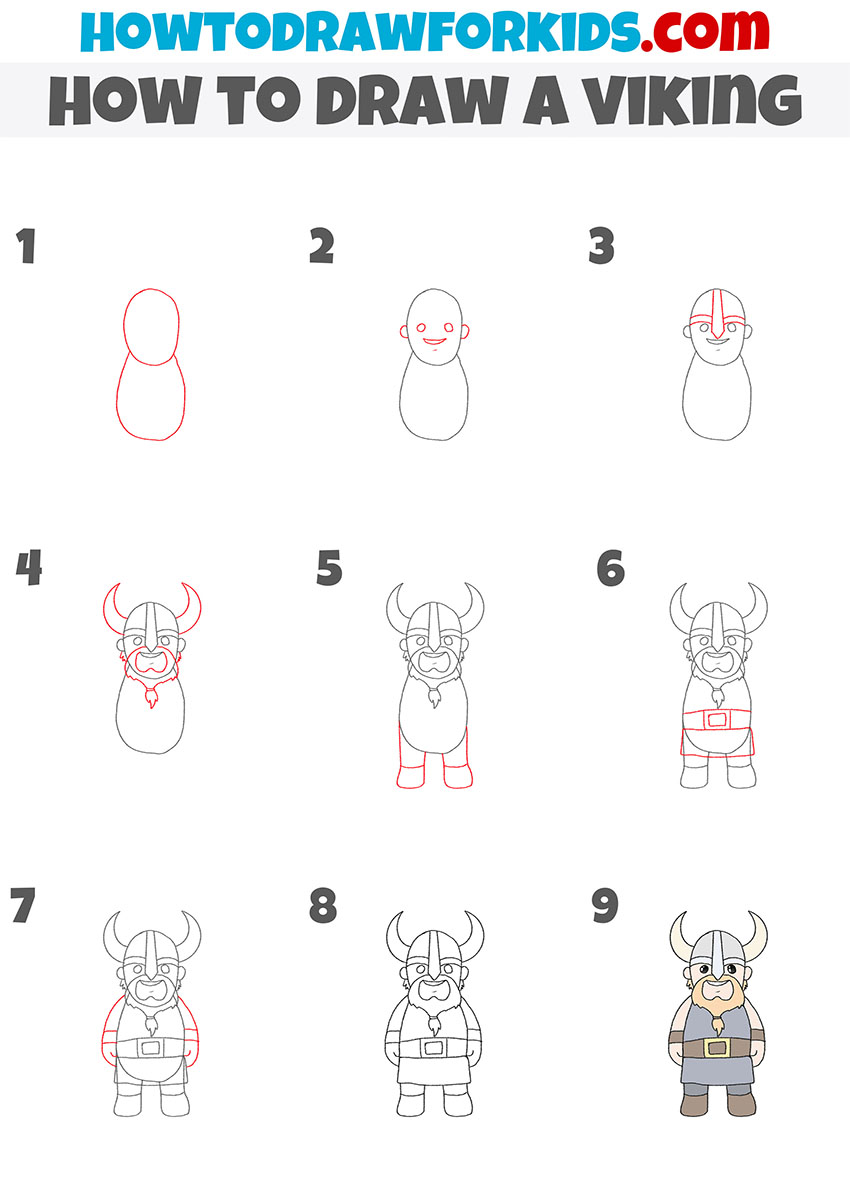
The Battle Plan
- Step 1: Traced a soda can for the helmet shape. Looked like a squashed tomato first try.
- Step 2: Drew two angry eyebrows. Made them too pointy – dude looked surprised not fierce.
- Step 3: Added beard scribbles. Whoops forgot neck so beard floated like creepy clouds.
- Step 4: Messed up horn placement. Left horn stuck out sideways like a car antenna.
- Step 5: Shaded with finger smudges. Result: warrior looked dirty not battle-worn.
Total Disaster Zone
First attempt took three minutes. Showed my wife – she laughed so hard she snorted coffee. My Viking resembled a confused hillbilly with helmet hair. Paper tore from erasing too much.
Round Two Fixes
- Tried smaller helmet circles using bottle cap
- Gave him squinty eyes by drawing less eyebrow
- Connected beard to chin properly (game changer!)
- Horns now pointing up instead of sideways
- Light pencil scratches for beard texture not scribbles
Final version still won’t go in any museum but hey at least looks like human now. Used kindergarten crayons for coloring – made horn tips blood red like the tutorial suggested. Actually proud enough to tape it on the fridge. Moral? Vikings won’t look perfect fast but five steps do work if you fix your screwups.