Alright, so I finally tackled making those Viking woman accessories last weekend, the stuff that really makes the costume pop. Wanted everything to look kinda rough and real, y’know, not some shiny store-bought costume junk. Started simple, ’cause honestly, that’s the only way I know how.
Finding the Base Stuff First
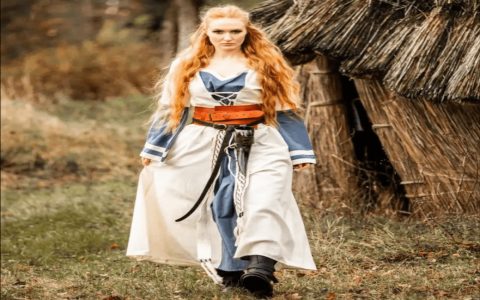
Right, first thing was the actual clothes. Didn’t need anything fancy. Dug out this old off-white linen dress I had from another project – kinda shapeless, but perfect Viking base layer vibes. Threw a simple brown wool tunic thing over it. Found it ages ago in a thrift shop, slightly scratchy, exactly what I needed.
Now, The Belt Stuff
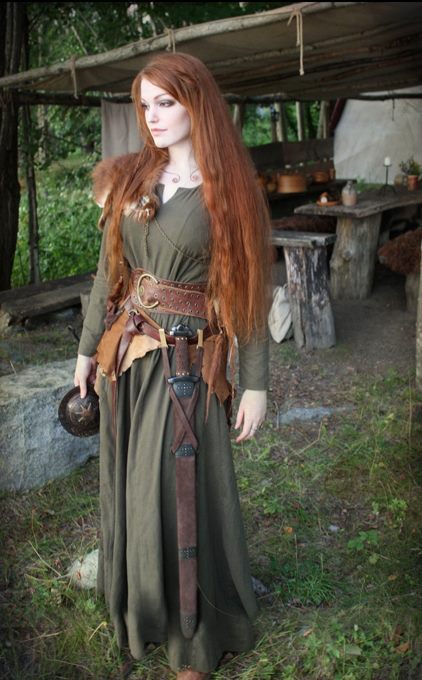
Needed something to hold it all together and hang gear on. Grabbed this thick leather belt I found last year at a flea market – super cheap ’cause it looked kinda rough. Perfect! Then raided my bits-and-bobs box for things to hang off it. Found an old metal cup (probably meant for camping?); hammered it lightly with a rock to dent it, soaked it in strong tea overnight, boom – instant Viking drinking pouch. Tied a strip of scrap leather around it to attach it to the belt.
Also made a super basic little bag: just a square of that same kinda rough wool fabric from the tunic, folded over, sewed up two sides with thick, ugly stitches (wanted it to look handmade, right?). Turned it inside out so the messy seams showed, stuck a plain loop of leather cord through the top fold as the handle. Hung that on the belt too. Put my phone and keys inside – hid them completely!
Jewelry Time (The Rustic Way)
Needed some bling, Viking style. No fancy stuff. Went into the garden, grabbed some cool-looking twigs and a few smooth pebbles from the driveway.
- Brooches: Bent some thick copper wire I had leftover into rough circle shapes (more like ovals, honestly) – not neat at all. Used pliers to twist the ends into a pin clasp. Poked the tunic closed under my shoulders. Made another smaller pin thing lower down.
- Necklaces: More wire! Made another rough circle, bigger this time. Wrapped a tiny pebble tightly in thin leather cord using basic knots, tied it to hang off the circle. Instant pendant. Also strung some big wooden beads I had lying around onto leather thong. Tied knots on either end. Simple.
- Arm Rings: Took some thicker brass craft wire, bent it roughly around my upper arm – twice. Didn’t solder it, just left the ends overlapping. Looks cool and loose.
Headpiece & Foot Stuff
Headband: Cut a long strip of soft scrap leather. Punched holes near both ends. Threaded a piece of thin leather cord through, tied it loosely around my head. Stuck a couple of small feathers I found on a walk near the end.
Shoes: Didn’t have cool boots. Thick wool socks pulled up high over comfy brown leggings. Shoved my feet into sturdy brown ankle boots. Honestly, you barely see the boots under the leggings. Looks okay! Maybe rub some dirt on them later…
Final Touches & Getting Weathered
The costume felt too clean. Got messy.
- Rubbed the whole outfit – dress, tunic, cloak, bag – with damp coffee grounds. Sounds nuts, but it gives this great uneven stain, like years of wear. Let it dry, then brushed most off.
- Stomped around the backyard in everything, especially dragging the hem of the cloak a bit. Rolled the leather belt up, unrolled it, scrunched it. Made it look lived-in.
- Took the knife I used for the wire (just a small kitchen one), rubbed the handle with wet earth to darken it, scratched the blade lightly with a rock. Stuck it through the belt loop.
Done! Stepped back. Huge difference those little bits made. The belt hung with stuff, the clunky jewelry, the rough bag, stained fabric… transformed the basic clothes. Felt way more legit stomping around the house. Coffee stain trick is gross but brilliant. Took photos outside – looks properly rugged. Those thrift store finds and bits from the garden did the heavy lifting. Maybe find a better stone for the pendant next time, but honestly, good enough!